First Login & Setup
This guide walks you through your first login and the Setup Assistant — from setting your password to seeing your first endpoint connect. It takes about five minutes and ends with a monitored agent reporting into your dashboard.
What you'll need
- The invitation email from Sielum with your magic link (request access at sales@sielum.io)
- At least one developer workstation (Linux, macOS, or Windows) you want to monitor
curland administrator (sudo) access on that workstation
1. First login
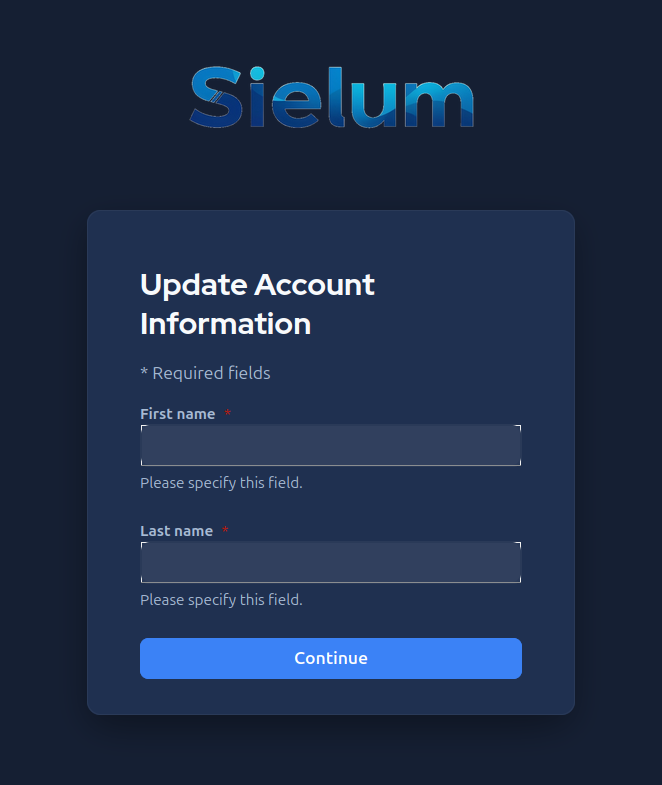
Open the magic link from your invitation email and set a password. On your first login, Sielum asks you to complete your account details. Enter your first name and last name, then click Continue.
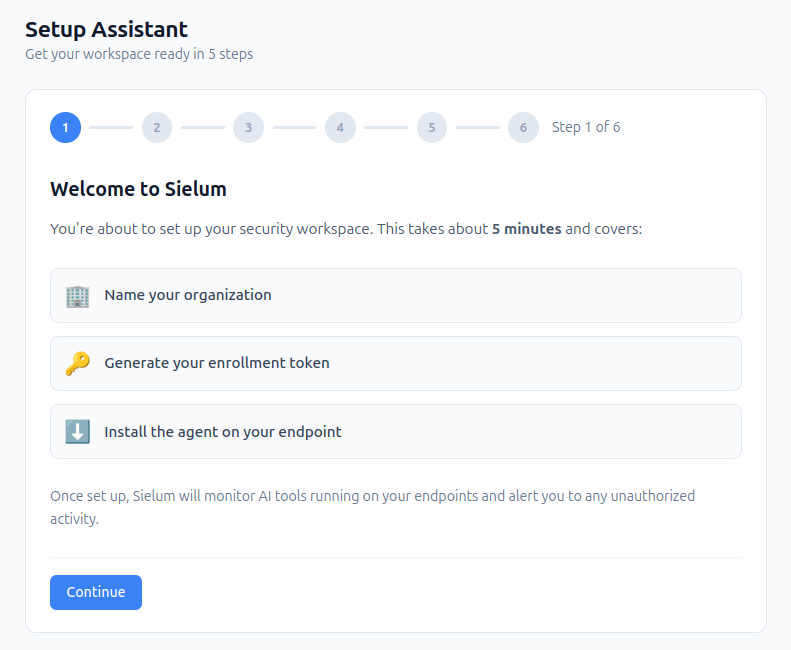
2. Welcome to the Setup Assistant
After logging in, the Setup Assistant starts automatically and guides you through three things: naming your organization, generating an enrollment token, and installing the agent on your first endpoint.
Click Continue to begin.
3. Name your organization
Enter a name for your organization. This name appears in your dashboard header and in exported reports, so use something your team will recognize (for example, your company or IT department name).
Click Continue.

4. Generate your enrollment token
The enrollment token authorizes one device to register with your tenant. During installation, the agent exchanges this token for a device certificate and a tenant API key.
Give the token a recognizable label (for example, Initial onboarding), then
click Generate Token.
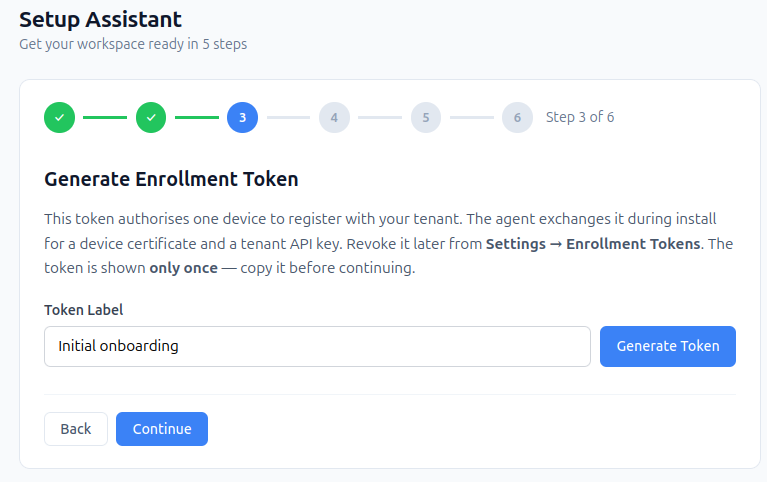
The token is shown only once. Copy it before continuing. You can revoke it later and issue new ones from Settings → Enrollment Tokens.
5. Install the agent
Select the operating system of the endpoint you want to monitor — Linux, macOS, or Windows — and copy the one-line install command. Run it on the workstation. The command downloads the agent binary, writes the configuration with your enrollment token, and registers it as a system service automatically.
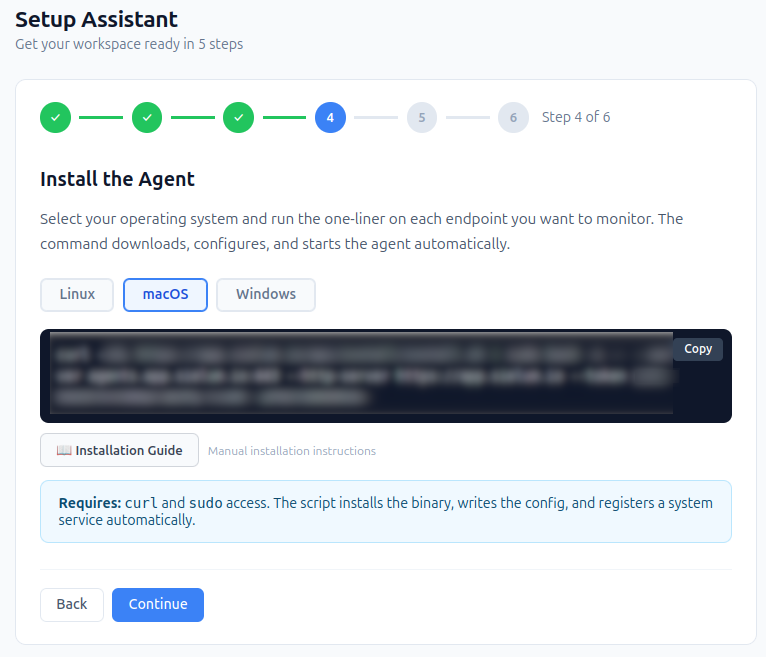
The installer needs curl and sudo access. For manual installation and
platform-specific details, see the Agent Installation guide.
Once the command has run on your endpoint, click Continue.
6. Waiting for your first agent
The assistant now polls for your first endpoint every few seconds. As soon as the agent you just installed checks in, this step completes automatically — usually within a minute.
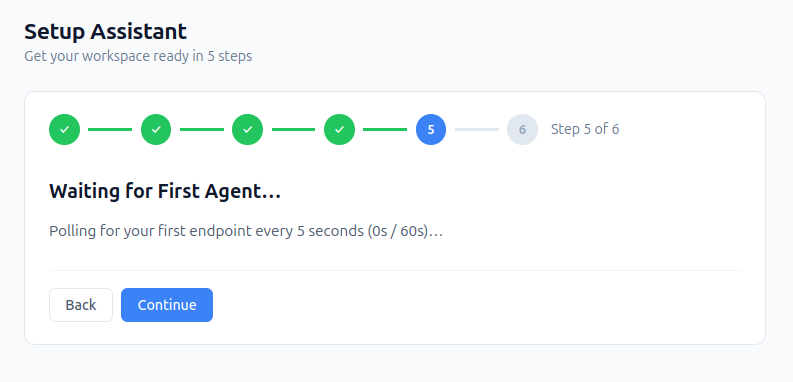
If nothing appears after a minute, confirm the install command finished without errors and that the workstation has outbound access on port 443. See the Agent Installation guide for troubleshooting.
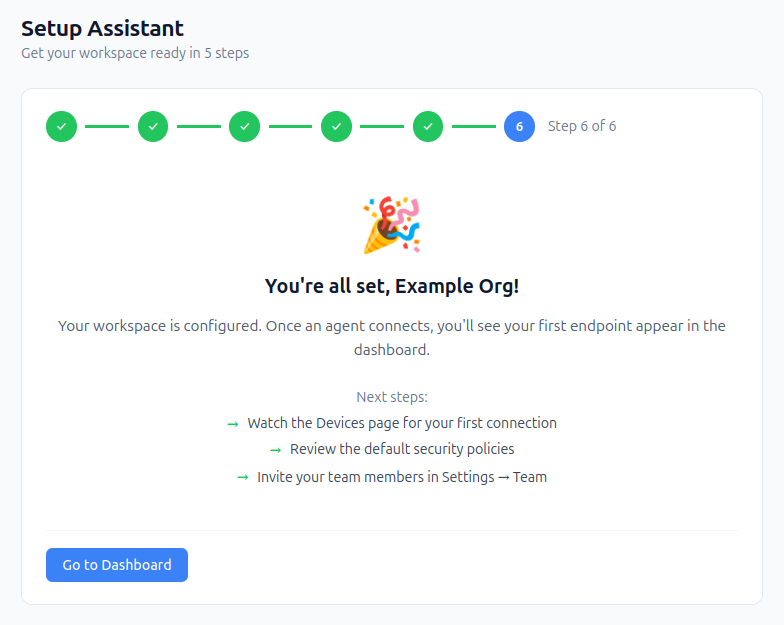
7. You're all set
Your workspace is configured and your first endpoint is connected. From here you can:
- Watch the Devices page for your connected endpoints
- Review the default security policies
- Invite your team members under Settings → Team
Click Go to Dashboard to start monitoring.